


How do you replace a brake air chamber (brake booster) on a semi-truck?
Follow the 20 detailed steps presented by our technician Marc-André to safely remove, adjust, and install a new brake inner tube. Discover our professional tips, the equipment required, and the right steps to take to extend the life of your braking system.
*The video is in French, but it is a great way to illustrate all the steps mentionnend in this post.
Changing a brake booster—also known as a brake chamber—may seem difficult, but with the right tools and know-how, it’s a perfectly achievable task.
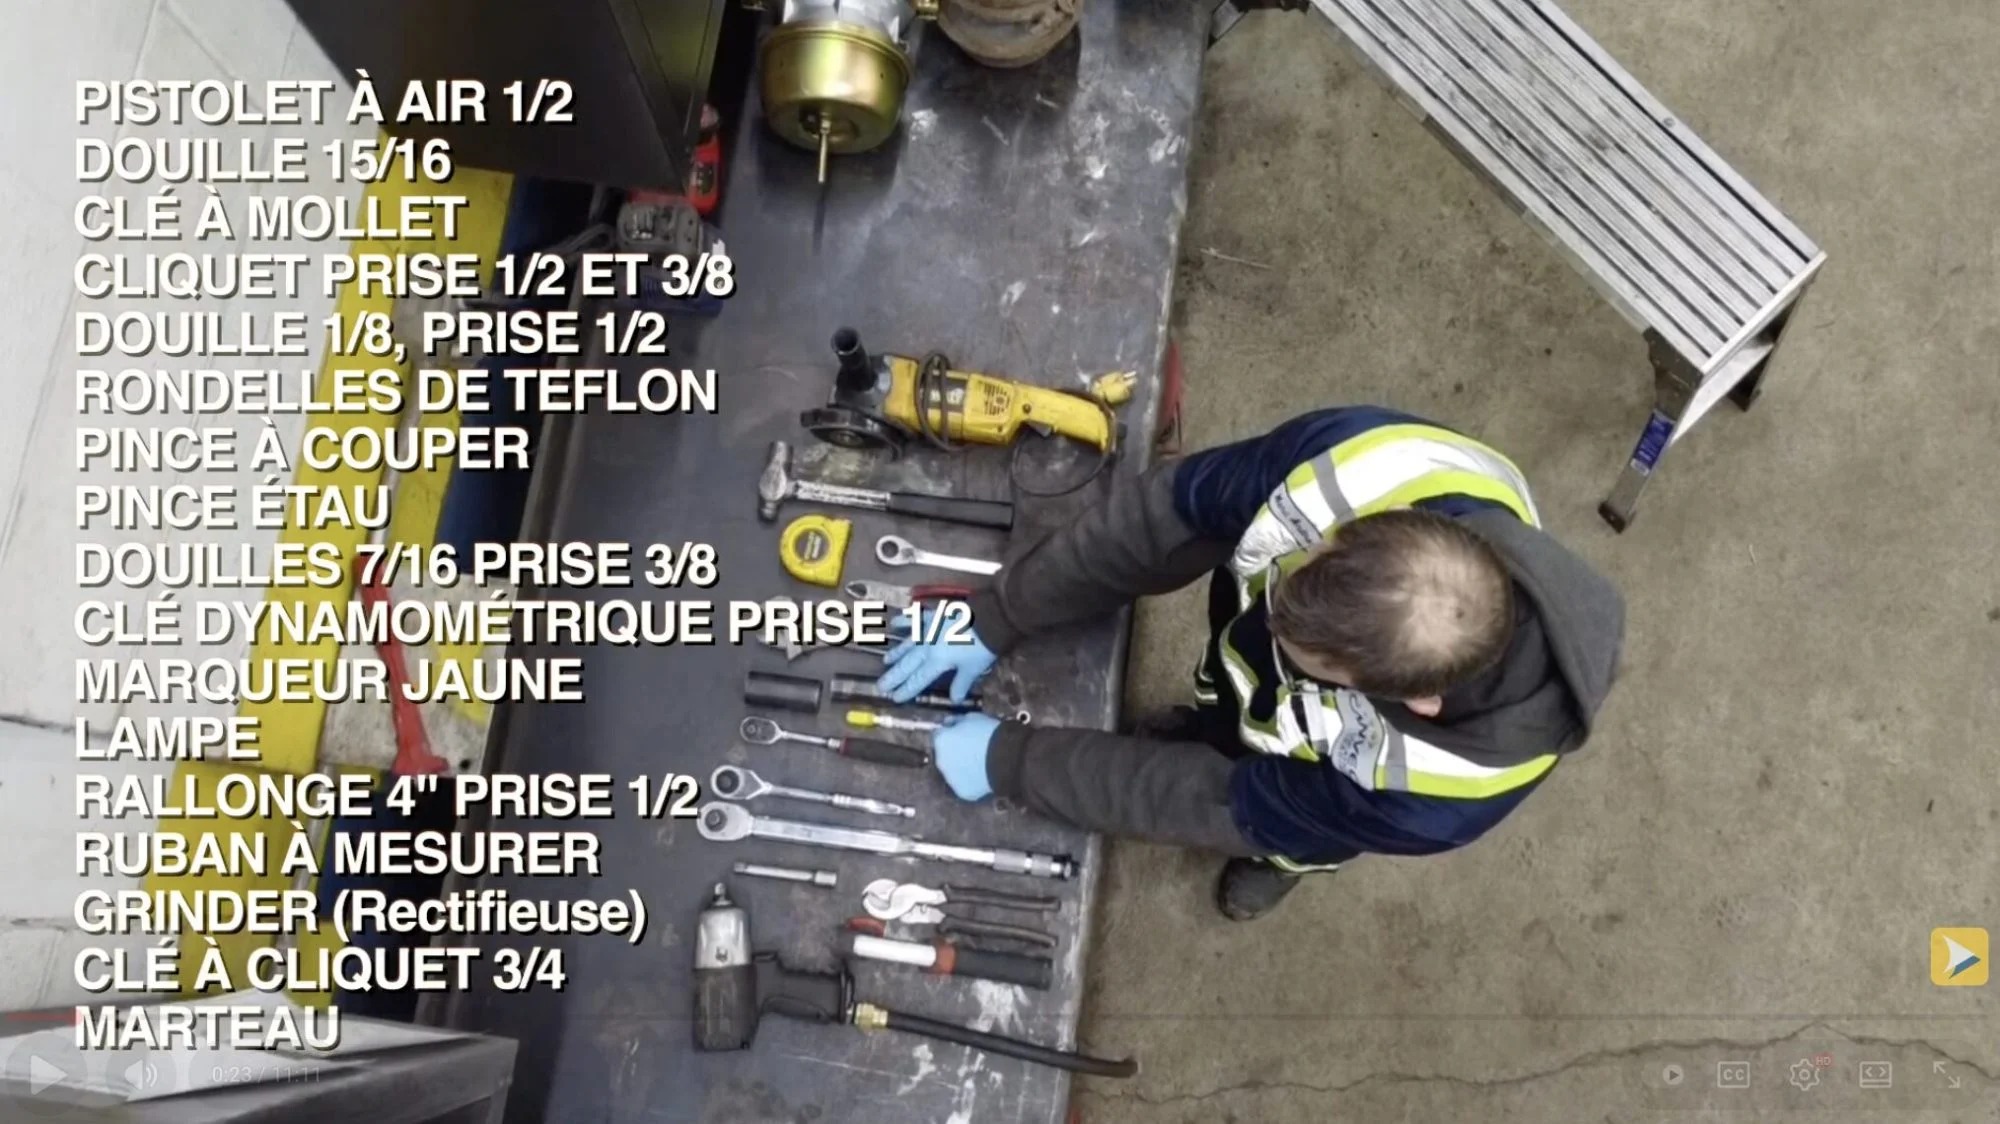
Equipment needed to change a brake booster
Before you start, make sure you have:
- Air gun ½
- 15/16 socket
- Adjustable wrench
- Ratchet (½ and ⅜ sockets)
- 1/8 socket (½ socket)
- Teflon washers
- Pliers (cutting, vise)
- 7/16 sockets (⅜ socket)
- Torque wrench (½ socket)
- Yellow marker
- Flashlight
- 4″ extension (½ socket)
- Tape measure
- Grinder
- ¾ ratchet wrench
- Hammer
The 20 steps to a successful replacement
Follow the 20 detailed steps presented by our technician Marc-André.
- Step 1 – Insert the compression rod and compress (0:39) – First secure the brake spring to prevent any dangerous residual pressure.
- Step 2 – Mark the position of the hoses (1:13) – A simple visual marker will prevent any mistakes during reassembly.
- Step 3 – Cut the hoses (1:29) – Use sharp pliers to make clean cuts.
- Step 4 – Remove the hoses and fittings (1:50) – Disconnect carefully without forcing the threads.
- Step 5 – Remove the cutter pins (2:11) – Keep them if they are still in good condition.
- Step 6 – Loosen the brake (2:34) – Loosen the brake rod to release the inner tube.
- Step 7 – Check the position of the inner tube (2:49) – Before removing it, note its orientation for reassembly.
- Step 8 – Unscrew the nuts from the inner tube (2:58) – Use the appropriate socket and proceed gradually.
- Step 9 – Remove the brake inner tube (3:12) – Handle it carefully, as it may still be pressurized.
- Step 10 – Check the positioning of the new inner tube (3:23) – Make sure it matches the configuration of the old one.
- Step 11 – Adjust the new brake inner tube (3:30) – Check the length and position of the push rod.
- Step 12 – Install the new inner tube (6:10) – Position it and secure it in the designated anchor points.
- Step 13 – Lightly tighten the nuts (6:34) – Do not tighten completely until everything is aligned.
- Step 14 – Torque the bolts (6:50) – Tighten to the recommended torque using a torque wrench.
- Step 15 – Tighten the brake and replace the clevis pin (7:14) – Reposition the brake and secure the pin.
- Step 16 – Apply Teflon tape to the threads (8:10) – Guaranteed watertightness for new fittings.
- Step 17 – Complete the installation of the fittings (9:25) – Screw them in tightly without forcing them.
- Step 18 – Secure the fittings (9:43) – Use an adjustable wrench to stabilize the assembly.
- Step 19 – Remove the compression rod and close the cap (10:04) – Gently release the spring and replace the safety cap.
- Step 20 – Final check (10:43) – Visually inspect, test the brake, and ensure there are no air leaks.
Equipment featured in the video
See the Bendix product on our website
Do you like this type of content? Check out the Canvec YouTube channel.
Discover also:
Heavy Vehicle Mechanics in Action
About CANVEC
Founded in 1990, CANVEC specializes in truck and trailer rentals, 24/7 roadside assistance, and the sale of parts and liftgates. Under the leadership of Danny Lefebvre, President and CEO, the company has accumulated more than 35 years of expertise and has established itself as the reference in Quebec.
CANVEC has more than 1,200 units available for rental, fast roadside assistance, a fully equipped workshop, and qualified technicians who are always ready to respond to your call.
QUICKLY ON THE ROAD. BECAUSE EVERY MINUTE COUNTS.
🔗 Visit the Canvec website
📘 Facebook
📸 Instagram
▶️ YouTube
💼 LinkedIn